Install Ghost .5 on CentOS 7 w/NGINX
I recently wrote of the migration from WordPress to Ghost. In this post I want to share with you the installation workflow I used. I plan to go cradle to grave through the process.
I’ve tested it a number times, and it works every time, so even if you’re a novice you should be able to get it going. Just follow the steps:
Assumption: You have a clean install of Centos 7.0. For my scenario I’m using a droplet from Digital Ocean. What’s really awesome is that Digital Ocean actually provides a preconfigured Droplet for those that want to leverage Ghost. I believe it’s built on Ubuntu. I personally prefer Centos.
Required Server Installations
Because you’re working in an absolutely clean environment, meaning all you did was create the droplet itself. You will need to install the following applications.
The order doesn’t really matter:
1. Define the repository to pull Node.js, install node.js and install npm:
`[root@server ~]# yum install epel-release -y`

`[root@server1 ~]# yum install nodejs npm --enablerepo=epel`
2. Install Vim and Unzip:
`[root@server1 ~]# yum install -y vim unzip`
3. Install a Process Manager to control your Node.js apps. This will allow you to configure node.js to run indefinitely and you won’t have to worry about restarting if the server goes down. It’s a really cool project and works wonderfully. Instead of using Yum, you’ll be using the NPM installer.
`[root@server1 ~]# npm install pm2 -g`
This should be everything you need on a clean box.
No, because this is a node.js application, you won’t need a Apache, and technically it’ll work without NGINX as well, but the url structure won’t be pretty. You could use Apache to redirect the port 80 traffic to your node.js application, but it’s not necessary in our case, and NGINX is just so much cleaner than Apache.
4. Install GIT you’ll need it later when configuring things like themes
`[root@server1 ~]# yum -y install git`
5. Define the repo you want to use for **NGINX**
`[root@server1 ~]# vim /etc/yum.repos.d/nginx.repo`
Add the following into the file:
>[nginx]
name=nginx repo
baseurl=http://nginx.org/packages/centos/$releasever/$basearch/
gpgcheck=0
enabled=1`
6. Install NGINX
`[root@server1 ~]# yum install nginx -y`
Install The Ghost Install
Now that you have all the basic apps on the server, let’s go about getting Ghost configured.
1. Create a directory you want the application to live. Make note that it doesn’t have to be in /var/www/html, you can definitely create that, but it’ll work just fine in /home/website-1. It’s totally your preference and will work regardless.
For our purposes, I’ll just create /var/www/[name of your website]:
`[root@server1 ~]# mkdir /var/www/
[root@server1 ~]# mkdir /var/www/websitename`
2. Navigate to **websitename**
`[root@server1 ~]# cd /var/www/websitename`
If you check your work space it should reflect the change:
`[root@server1 websitename]#pwd
/var/www/websitename`
3. Download the Ghost installer:
`[root@server1 ~]#curl -L https://ghost.org/zip/ghost-latest.zip -o ghost.zip`
4. Unzip the installer, in this case it’ll unzip the files and dump them into a ghost directory. This means that after the install it’ll look like this: /var/www/websitename/ghost
`[root@server]# unzip -uo ghost.zip -d ghost`
5. I like to have a bit of a cleaner setup so I move all the files up one directory from ghost and leave them at the root of my site directory. I then clean up my mess to avoid nonsense in my directory:
`[root@server]# mv ghost/* ./
[root@server]# rm -rf ghost/
[root@server]# mv -rf ghost.zip`
All your files should be in the following directory now: /var/www/websitename
6. Now you will install the application so that it’s functioning. You will use the npm installer:
`[root@server]# npm install -production`
Now you need to Configure Everything
Now that everything is installed we have to go Ghost and NGINX to get things configured.
Configure Ghost
The configuration file for ghost can be found in the config.js at the root of the install, by default after install it’ll be called config.example.js.
1. Copy the file into a clean file and proceed:
`[root@server1 ~]# cp config.example.js config.js`
2. Open the config.js file and modify the **production** section:
{<1>}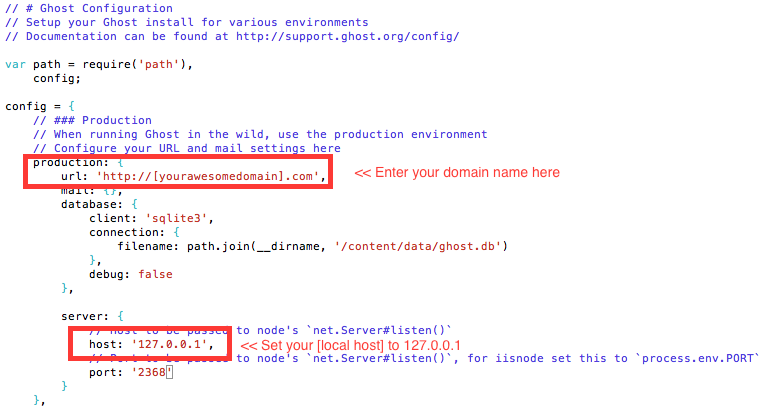
It’s important that you update the url: with your domain. It’s also important that you update the host:, under server to 127.0.0.1 not doing so will generate 503 NGINX errors when you go live.
If you wish to test the install before going live, which is probably advisable. You can leave the url with it’s default value and update the host with your server ip. This will let you test it live, without configuring NGINX remotely by going to http://[your ip]:2368
Yes, the default port for the application is 2368. This is why we installed NGINX.
3. Configure Ghost to run forever using pm2
`[root@server1 ~]# NODE_ENV=production pm2 start index.js --name "Ghost"`
If you wish to kill the service, or if you make any changes you can stop or restart Ghost via these commands:
`[root@server1 ~]# pm2 stop Ghost`
and
`[root@server1 ~]# pm2 restart Ghost`
There is no start option.
Configure NGINX
Naturally we’re going to want people that go to our website via a clean url: http://[yourawesomedomain].com
1. Let’s start NGINX
`[root@server1 ~]# systemctl start nginx.service`
2. Let’s set it to run indefinitely
`[root@server1 ~]# chkconfig nginx on
3. Let’s set it to push all incoming traffic on port 80 to port 2368 so that people can see our website. Start by creating a .conf file that NGINX will use as a configuration file.
`[root@server1 ~]# vim /etc/nginx/conf.d/yourawesomedomain.conf`
4. In the file, add the following basic code:
{<2>}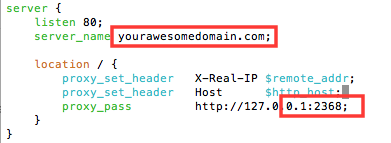
5. Restart NGINX
`[root@server1 ~]# systemctl restart nginx.service`
Your New Ghost Website is Now Live
Congrats!! If you followed the instructions above your website should now be alive and visible if you navigate to it via your url: http://[yourawesomdomain].com
{<3>}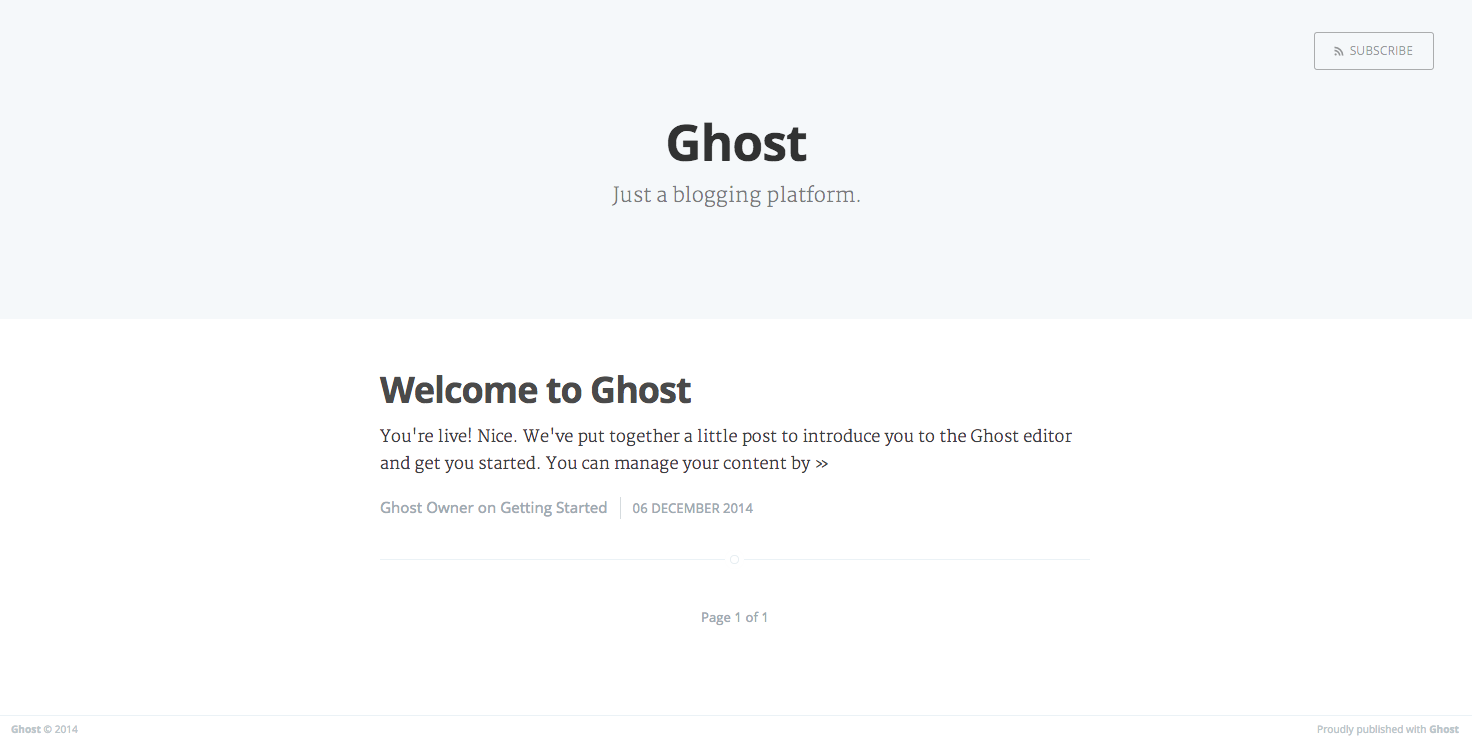
If for some reason you run these steps and notice something missing, let me know. But I’m pretty sure this should be everything you need. Sometimes it’s hard to know what it is you don’t know, once you know though.
Great tutorial, if somebody is interested how to do the same in docker and try out ghost without polluting your machine take a look here: https://codeastronaut.com/how-to-start-a-blog-with-docker-ghost/